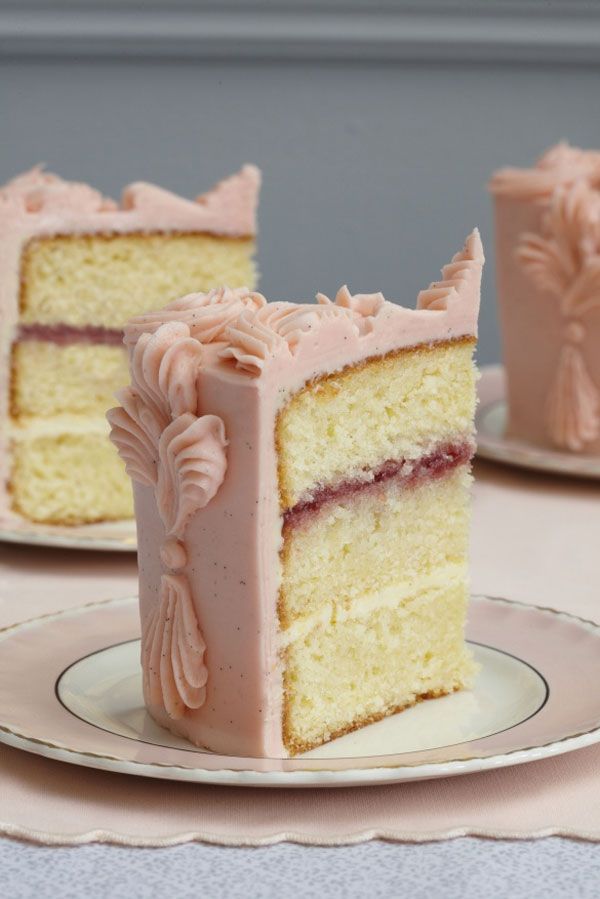
Victoria Sponge Cake with Buttercream Frosting
. . . some may remember the glimpse into peggy porschen cakes, the astonishingly lovely & pretty in pink cake shop in central london; and funnily enough, months after happening upon the image, above, have only recently discovered that the cake was from the very same shop, and the recipe, from the shop’s book, boutique baking — a wonderful coincidence indeed; and so, for this summer’s garden parties & moonlit soirées, classic victoria sponge cake with pale pink buttercream frosting . . .
Based on a classic Victoria Sponge, the key to this simply delicious cake’s success is using the best quality ingredients. The design is inspired by the era of the cake’s origin, decorated using a Victorian-style scroll and shell piping technique.”
Makes one 15cm (6in) round cake, serving 8–12 slices
I N G R E D I E N T S | sponge
200g unsalted butter, softened
200g caster sugar
Pinch of salt
Seeds of ½ vanilla pod
4 medium eggs
200g self-raising flour
I N G R E D I E N T S | buttercream filling
300g unsalted butter, softened
300g icing sugar, sifted
pinch of salt
seeds of ½ vanilla pod
small amount of pink food paste colour
3 tbsp any good-quality raspberry jam
E Q U I P E M EN T
three 15cm (6in) round sandwich tins
cake leveller or large serrated knife
non-slip turntable
flat disc to place on top of the turntable
(use the loose base of a 30cm (12in) springform cake tin)
15cm (6in) round cake card
metal side scraper
two plastic piping bags
medium star piping nozzle
plain round 4mm (¼in) piping nozzle
Bake the sponges one day ahead of serving. Prepare the buttercream filling, assemble and decorate the cake on the day of serving.
Preheat the oven to 175°C/gas mark 4.
Prepare the sandwich tins by greasing and lining with greaseproof paper.
To make the sponge:
Place the butter, sugar, salt and vanilla seeds in a mixing bowl and cream together until pale and fluffy.
Beat the eggs lightly in another bowl and slowly add to the butter mixture while whisking quickly. If the mixture starts to separate or curdle, stop adding the egg and beat in 2–3 tablespoons of the flour — this will rebind the batter. Once all the egg has been added and combined with the butter mixture, sift in the flour and stir until the batter is just combined — this will ensure the sponges stay light and fluffy.
Divide the batter evenly between the sandwich tins. If you find it difficult to measure by eye, use your kitchen scales to weigh out the amount of sponge mixture for each tin.
Bake for 15–20 minutes, depending on your oven. If you are using deeper cake tins, the sponges will take longer to cook. The sponges are cooked when the sides are beginning to shrink away from the edges of the tins and the tops are golden brown and spring back to the touch. If in doubt, insert a clean knife or wooden skewer into the centre of each sponge; it should come out clean.
To make the buttercream frosting:
Place the butter, icing sugar, salt and vanilla seeds into a mixing bowl and cream together until very pale and fluffy.
Add a small amount of pink food colour to the mixture and stir through until combined and the buttercream is a pastel shade.

To assemble the cake:
Trim and sandwich together the three sponge layers using one layer of buttercream filling and one layer of raspberry jam. With the remaining buttercream filling, cover or mask the top and sides of the cake.
To decorate:
Place the cake either on to a cake stand or on top of the turntable covered with a piece of greaseproof paper.
Place a star nozzle into a plastic piping bag and fill with a generous amount of the remaining buttercream. Place a round nozzle into another plastic piping bag and fill with a small amount of the remaining buttercream.
Divide the top of the cake into eight equal segments. Using the star nozzle, pipe a ring of C-scrolls around the circumference, revolving the turntable as necessary. Next, pipe a shell from the middle of each C-scroll towards the centre. Where all eight shells meet, pipe a rosette on top at the centre of the cake top. Using the round nozzle, pipe a small dot between each shell.
Using the star nozzle, pipe eight ‘fleur de lys’ evenly around the sides at the top edge, with a single upside-down shell underneath at the bottom edge. To finish, pipe a small dot between the ‘fleur de lys’ and shell. If the cake has been placed on greaseproof paper, chill until the piped dots are set before transferring to a cake stand.
Serve the cake at room temperature. This cake is best enjoyed within 3 days of baking, but can last for up to 1 week.
[photography: copyright of georgia smith; recipe & instructions by peggy porschen, from the book boutique baking, adapted; via mullberry]